Host Your Own Private Home Email Server

Background

The availability and prevalence of high-quality gratis email providers has made people take for granted the true cost of using these services. These companies are hoping they can collect enough valuable information from reading your emails that they can make up the difference of providing you the service at no cost. A necessary step to regain control over your email and maintain your privacy is to host your own private email server using free (as in freedom) software.

There are several components involved in a email server and you have choices to make between alternative free software projects. At a high level, the the primary components are the MTA, MDA, and MUA.

Mail Transfer Agent (MTA)

A Mail Transer Agent (MTA) uses SMTP to send/receive emails. I recommend Postfix unless special circumstances require the features of the alternative MTAs.

  • Sendmail – perhaps the most well known MTA but notoriously hard to configure and a poor history of security breaches
  • qmail – ideal for size constrained environment but doesn’t support modern email standards
  • exim – very flexible, powerful, and general purpose, but not as fast as or secure as Postfix
  • Postfix – modern, secure, and efficient, but has a restricted feature set by design
Mail Delivery Agent (MDA)

A Mail Delivery Agent (MDA) receives messages from a MTA and delivers the mail to a local mailbox typically using either Post Office Protocol (POP) or Internet Message Access Protocol (IMAP). I recommend Dovecot over the alternatives.

  • Cyrus – difficult to configure and non-standard format
  • Courier – consumes more server resources, slower, and less secure than dovecot
  • Dovecot – modern, fast, and secure
Mail User Agent (MUA)

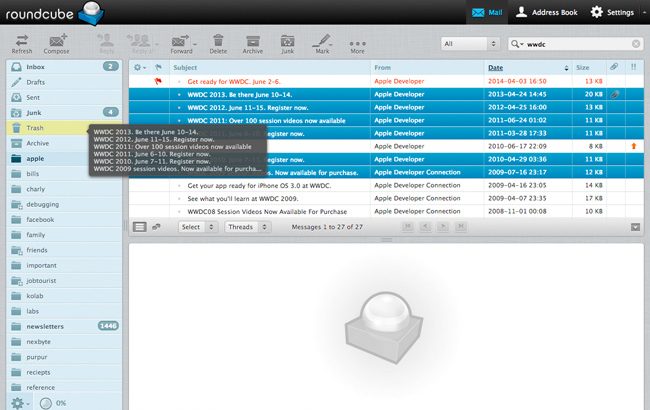
A Mail User Agent (MUA) is a program used by the end user to read and process mail. A MUA can be a local email client such as Thunderbird or it can be a remote webmail server that provides access to clients via a web browser. If you want to host a webmail server, I recommend Roundcube unless you desire the additional features offered by Horde such as mobile email access.

  • Squirrelmail – very simple but doesn’t have spell check or support HTML composition
  • Horde – has more complete features such as mobile email access, advanced productivity features including event reminders, news feed, notes, and a calendar
  • Roundcube – very user friendly, modern, and pretty

Setup PHP and MySQL

Prerequisites

On Debian 9 GNU/Linux, install the following PHP and MySQL packages:

sudo apt-get install -y php5-fpm php5-imap php5-mysql php5-mcrypt php5-intl mysql-server mysql-client
Configuration

Set the timezone in the PHP configuration file:

sudo sed -i -e 's/^;date\.timezone =$/date.timezone = America\/Chicago/' /etc/php5/fpm/php.ini

Create a new user and group:

sudo groupadd -g 1001 g1001
sudo useradd --no-create-home -g 1001 -u 1001 u1001

Create PHP fpm socket directory:

sudo mkdir -p /etc/php5/fpm/socks

Remove the default FastCGI Process Manager (FPM) pool:

sudo rm -f /etc/php5/fpm/pool.d/www.conf

Create a new fpm pool configuration file /etc/php5/fpm/pool.d/ssl_example.com.conf and copy into it the following content.

[ssl_example.com]
listen = /etc/php5/fpm/socks/ssl_example.com.sock
user = u1001
group = g1001
listen.owner = www-data
listen.group = www-data
listen.mode = 0666
pm = dynamic
pm.max_children = 50
pm.start_servers = 1
pm.min_spare_servers = 1
pm.max_spare_servers = 5
pm.max_requests = 0
php_admin_value[open_basedir]=/
php_admin_value[session.save_path]=/home/clients_ssl/example.com/tmp
php_admin_value[upload_tmp_dir]=/home/clients_ssl/example.com/tmp
php_admin_value[disable_functions]=dl

Ensure that the file has the proper permissions:

sudo chmod 644 /etc/php5/fpm/pool.d/ssl_example.com.conf

Start the PHP FPM service:

sudo systemctl start php5-fpm.service

Setup Postfix

Prerequisites

On Debian 9 GNU/Linux, install the following Postfix packages:

sudo apt-get install -y posftfixadmin libsasl2-modules libsasl2-modules-sql postfix postfix-mysql
Configuration

Create the postfix database.

sudo mysql -u root -p dbpassword1 -e "CREATE DATABASE postfix; GRANT ALL PRIVILEGES ON postfix.* TO 'postfix_admin'@'%' IDENTIFIED BY 'dbpassword1'; GRANT SELECT ON postfix.* TO 'postfix'@'%' IDENTIFIED BY 'dbpassword2'; FLUSH PRIVILEGES;"

Create /etc/postfix/main.cf with the following contents:

myorigin = /etc/mailname
smtpd_banner = $myhostname ESMTP $mail_name (Debian/GNU)
biff = no
append_dot_mydomain = no
readme_directory = no
smtpd_tls_cert_file=/etc/ssl/certs/ssl-cert-snakeoil.pem
smtpd_tls_key_file=/etc/ssl/private/ssl-cert-snakeoil.key
smtpd_use_tls=yes
smtp_tls_CAfile = /etc/ssl/certs/ca-certificates.crt
smtpd_tls_session_cache_database = btree:${data_directory}/smtpd_scache
smtp_tls_session_cache_database = btree:${data_directory}/smtp_scache
smtpd_relay_restrictions = permit_mynetworks permit_sasl_authenticated defer_unauth_destination
myhostname = myhost.example.com
alias_maps = hash:/etc/aliases
alias_database = hash:/etc/aliases
mydestination = localhost
relayhost = [smtp.myisp.net]:587
mynetworks = 127.0.0.0/8 192.168.253.0/24 [::ffff:127.0.0.0]/104 [::1]/128
mailbox_command = procmail -a "$EXTENSION"
mailbox_size_limit = 0
recipient_delimiter = +
inet_interfaces = all
virtual_uid_maps = static:3000
virtual_gid_maps = static:3000
virtual_mailbox_base = /home/vmail
virtual_mailbox_domains = mysql:/etc/postfix/mysql_virtual_mailbox_domains.cf
virtual_mailbox_maps = mysql:/etc/postfix/mysql_virtual_mailbox_maps.cf
virtual_alias_maps = mysql:/etc/postfix/mysql_virtual_alias_maps.cf
relay_domains = mysql:/etc/postfix/mysql_relay_domains.cf
virtual_transport = lmtp:unix:private/dovecot-lmtp
smtpd_recipient_restrictions =
 permit_mynetworks,
 permit_sasl_authenticated,
 reject_non_fqdn_hostname,
 reject_non_fqdn_sender,
 reject_non_fqdn_recipient,
 reject_unauth_destination,
 check_policy_service unix:private/policyd-spf,
 reject_unauth_pipelining,
 reject_invalid_hostname
smtpd_sasl_auth_enable = yes
smtpd_sasl_security_options = noanonymous
smtp_sasl_auth_enable = yes
smtp_sasl_password_maps = hash:/etc/postfix/sasl_passwd
smtp_sasl_security_options =
smtpd_sasl_type = dovecot
smtpd_sasl_path = private/auth

Create /etc/postfix/mysql_virtual_mailbox_domains.cf with the following contents:

hosts = 127.0.0.1
user = postfix
password = dbpassword
dbname = postfix
query = SELECT domain FROM domain WHERE domain='%s' and backupmx = 0 and active = 1

Create /etc/postfix/mysql_virtual_mailbox_maps.cf with the following contents:

hosts = 127.0.0.1
user = postfix
password = dbpassword
dbname = postfix
query = SELECT maildir FROM mailbox WHERE username='%s' AND active = 1

Create /etc/postfix/mysql_virtual_alias_maps.cf with the following contents:

hosts = 127.0.0.1
user = postfix
password = dbpassword
dbname = postfix
query = SELECT goto FROM alias WHERE address='%s' AND active = 1

Create /etc/postfix/mysql_relay_domains.cf with the following contents:

hosts = 127.0.0.1
user = postfix
password = dbpassword
dbname = postfix
query = SELECT domain FROM domain WHERE domain='%s' and backupmx = 1

Create /etc/postfix/master.cf with the following contents:

smtp inet n - y - - smtpd -v
submission inet n - y - - smtpd
 -o syslog_name=postfix/submission
 -o smtpd_tls_security_level=encrypt
 -o smtpd_sasl_auth_enable=yes
 -o smtpd_client_restrictions=permit_sasl_authenticated,reject
 -o milter_macro_daemon_name=ORIGINATING
smtps inet n - y - - smtpd
 -o syslog_name=postfix/smtps
 -o smtpd_tls_wrappermode=yes
 -o smtpd_sasl_auth_enable=yes
 -o smtpd_client_restrictions=permit_sasl_authenticated,reject
 -o milter_macro_daemon_name=ORIGINATING
pickup unix n - y 60 1 pickup
cleanup unix n - y - 0 cleanup
qmgr unix n - n 300 1 qmgr
tlsmgr unix - - y 1000? 1 tlsmgr
rewrite unix - - y - - trivial-rewrite
bounce unix - - y - 0 bounce
defer unix - - y - 0 bounce
trace unix - - y - 0 bounce
verify unix - - y - 1 verify
flush unix n - y 1000? 0 flush
proxymap unix - - n - - proxymap
proxywrite unix - - n - 1 proxymap
smtp unix - - y - - smtp
relay unix - - y - - smtp
showq unix n - y - - showq
error unix - - y - - error
retry unix - - y - - error
discard unix - - y - - discard
local unix - n n - - local
virtual unix - n n - - virtual
lmtp unix - - y - - lmtp
anvil unix - - y - 1 anvil
scache unix - - y - 1 scache
maildrop unix - n n - - pipe
 flags=DRhu user=vmail argv=/usr/bin/maildrop -d ${recipient}
uucp unix - n n - - pipe
 flags=Fqhu user=uucp argv=uux -r -n -z -a$sender - $nexthop!rmail ($recipient)
ifmail unix - n n - - pipe
 flags=F user=ftn argv=/usr/lib/ifmail/ifmail -r $nexthop ($recipient)
bsmtp unix - n n - - pipe
 flags=Fq. user=bsmtp argv=/usr/lib/bsmtp/bsmtp -t$nexthop -f$sender $recipient
scalemail-backend unix - n n - 2 pipe
 flags=R user=scalemail argv=/usr/lib/scalemail/bin/scalemail-store ${nexthop} ${user} ${extension}
mailman unix - n n - - pipe
 flags=FR user=list argv=/usr/lib/mailman/bin/postfix-to-mailman.py
 ${nexthop} ${user}
policyd-spf unix - n n - 0 spawn
 user=policyd-spf argv=/usr/bin/policyd-spf

Create vmail user and group:

sudo groupadd -g 3000 vmail
sudo useradd -d /home/vmail -m -u 3000 -g 3000 vmail
sudo adduser postfix sasl

Start the postfix service:

sudo systemctl start postfix.service

Setup Dovecot

Prerequisites

On Debian 9 GNU/Linux, install the following Dovecot packages:

sudo apt-get install -y dovecot-core dovecot-mysql
Configuration

Configure /etc/dovecot/dovecot-sql.conf.ext:

driver = mysql
connect = host=127.0.0.1 dbname=postfix user=root password=dbpassword
default_pass_scheme = MD5
user_query = \
 SELECT '/home/vmail/%d/%n' as home, 3000 AS uid, 3000 AS gid \
 FROM mailbox WHERE username = '%u'
password_query = \
 SELECT password \
 FROM mailbox WHERE username = '%u'

Configure /etc/dovecot/conf.d/10-auth.conf:

auth_mechanisms = plain login
!include auth-sql.conf.ext

Configure /etc/dovecot/conf.d/10-mail.conf:

mail_location = maildir:/home/vmail/%d/%n:INDEX=/home/vmail/%d/%n/indexes
namespace inbox {
 inbox = yes
}

Configure /etc/dovecot/conf.d/10-ssl.conf:

ssl = no
ssl_cert = </etc/dovecot/dovecot.pem
ssl_key = </etc/dovecot/private/dovecot.pem

Configure /etc/dovecot/conf.d/20-imap.conf:

protocol imap {
 mail_max_userip_connections = 10
}

Configure /etc/dovecot/conf.d/auth-sql.conf.ext:

passdb {
 driver = sql
 args = /etc/dovecot/dovecot-sql.conf.ext
}
userdb {
 driver = sql
 args = /etc/dovecot/dovecot-sql.conf.ext
}

Configure /etc/dovecot/conf.d/10-master.conf:

service imap-login {
 inet_listener imap {
 }
 inet_listener imaps {
 }
}
service pop3-login {
 inet_listener pop3 {
 }
 inet_listener pop3s {
 }
}
service lmtp {
 unix_listener /var/spool/postfix/private/dovecot-lmtp {
 mode = 0600
 user = postfix
 group = postfix
 }
}
service imap {
}
service pop3 {
}
service auth {
 unix_listener auth-userdb {
 }
 unix_listener /var/spool/postfix/private/auth {
 mode = 0666
 }
}
service auth-worker {
}
service dict {
 unix_listener dict {
 }
}

Start the dovecot service:

sudo systemctl start dovecot.service

Setup Roundcube

Prerequisites

On Debian 9 GNU/Linux, install the following Roundcube packages:

sudo apt-get install -y roundcube roundcube-mysql
Configuration

Create and populate roundcube database:

sudo mysql -u root -p dbpassword1 -e "CREATE DATABASE roundcube; GRANT ALL PRIVILEGES ON roundcube.* TO roundcube@localhost IDENTIFIED BY 'rcpassword'; FLUSH PRIVILEGES;"
sudo mysql -u roundcube -p rcpassword < /usr/share/roundcube/SQL/mysql.initial.sql

Enable roundcube and reload apache2 service:

sudo a2enconf roundcube
sudo systemctl reload apache2

Proxy MTA

One challenge you may face if hosting the server at your home is your residential ISP may block incoming connections to TCP port 25 which is required for receiving incoming email on your MTA. One way around this problem is to set your MX record to point at a virtual server that is running a proxy MTA. Then setup a VPN tunnel between your remote virtual server and your local MTA and have the proxy MTA forward all messages to your local MTA.

Conclusion

Hosting your own email server is only the first step to regaining your email privacy. A major challenge is that very few people have the skills, time, or motivation to host their own email servers. As a result, most people you send emails to will be using email providers that spy on their users. Thus, your communication with those people will still be subject to surveillance. Lastly, there is always the issue of plaintext emails being intercepted by a third party. To properly defend against this, you need to share GPG encryption keys and encrypt the contents of the email.

Host Your Own Home VOIP System using Asterisk

Background

Some cable ISPs like comcast offer home VOIP systems for a hefty monthly fee. In addition to the extra cost, they often require you to rent a gateway from them. By renting a gateway from them, you not only incur an additional monthly fee for this, but more importantly you are giving them a backdoor into your cable modem and allowing them to use it as a wifi hotspot for strangers, often without your knowledge. To regain full control over your home network and VOIP system, you need to buy your own modem and host the VOIP system yourself using free (as in freedom) software.

A VOIP system could just be used for communicating between rooms in your house much like the phones in hotel rooms can call each other. But most likely you will want to be able to receive calls from outside of your house from the PSTN (Public Switched Telephone Network). To do this you will need to purchase a DID (Direct Inward Dialing) number from a SIP provider, which typically involves a small recurring charge.

Prerequisites

On Debian 9 GNU/Linux, the asterisk package needs to be installed.

$ sudo apt-get install -y asterisk

The following information about your SIP provider must be known:

  • SIP_USER – SIP username
  • SIP_SECRET – SIP password
  • SIP_HOST – SIP server hostname (DID Point of Presence)
  • SIP_IP – SIP server IP
  • SIP_PORT – SIP port
  • DID_PHONE_NUMBER – phone number from VoIP provider (10 digits with no delimiters)

The following information about your IP Phone must be known:

  • EXT_NUMBER – a 4 digit extension number
  • EXT_PASSWORD – the extension password
  • VM_NUMBER – a 4 digit voicemail number

The following information must be known about your network:

  • EXTERNHOST – hostname that resolves to your public WAN IP

Decide on the following information:

  • VOICEMAIL_PIN – numeric password for voicemail
  • EMAIL_ADDRESS – email address of voicemail account
Configure sip.conf

There are a ton of possible settings that can go in this file. The file is divided into several sections whose names are enclosed in square brackets.

  • context specifies the name of the context to which each extension is associated and is defined later in extensions.conf
  • register specifies the SIP registration parameters including the username, secret, host-name, and port
  • allowguest=no disables unauthenticated calls
  • allowoverlap=no disables overlap dialing support
  • srvlookup=no disables looking up SRV DNS records on outbound calls, which is unnecessary because we explicitly specified both the SIP IP address and port number in the register line
  • disallow and allow restricts the audio codecs that a device will accept or offer
  • alwaysauthreject=yes enables a security feature where the reject for a wrong password and wrong username appear the same way, which prevents a cracker from gaining knowledge about the system they are attempting to attack
  • canreinvite=no disables SIP re-invites, forcing asterisk to stay in the middle of the media
  • nat=force_rport,comedia modifies the behavior related to a server behind NAT (Network Address Translation); force_rport disables symmetric RTP support and comedia enables symmetric RTP support if the remote side requests it
  • qualify=yes enables sending a SIP OPTIONS command every 2 seconds to check that the device is still online
  • session-timers=refuse disables session timers
  • externhost=EXTERNHOST  specifies the FQDN to be resolved to acquire the public IP address of the asterisk server
  • externrefresh=15 specifies that externhost should be resolved every 15 seconds
  • localnet=192.168.0.0/255.255.0.0 excludes addresses in the subnet from any NATing efforts by asterisk, allowing the source addresses of SIP requests/response to include the internal address
  • host=HOST specifies the hostname of the sip peer
  • host=dynamic means that the sip peer must register
  • secret=SECRET allows a SIP peer to securely prove its identity
  • type=friend specifies that an entity is both a sip peer (receives calls) and user (places calls)
  • defaultuser=SIP_USER specifies the username for authentication in SIP INVITE requests from remote clients
  • fromuser=SIP_USER overrides the username when calling to this peer from asterisk
  • trustrpid=yes trust Remote-Party-ID SIP header
  • sendrpid=yes send Remote-Party-ID SIP header
  • insecure=invite disables authentication requirement for incoming SIP INVITE requests
  • deny and permit restrict the addresses of hosts that can attempt registration
[general]
context=internal
register => SIP_USER:SIP_SECRET@SIP_HOST:SIP_PORT
allowguest=no
allowoverlap=no
srvlookup=no
disallow=all
allow=ulaw
alwaysauthreject=yes
canreinvite=no
nat=force_rport,comedia
qualify=yes
session-timers=refuse
externhost=EXTERNHOST
externrefresh=15
localnet=192.168.0.0/255.255.0.0

[voipms]
context=internal
host=HOST
secret=SIP_SECRET
type=friend
defaultuser=SIP_USER
fromuser=SIP_USER
trustrpid=yes
sendrpid=yes
insecure=invite
deny=0.0.0.0/0.0.0.0
permit=SIP_IP/255.255.255.255

[EXT_NUMBER]
type=friend
host=dynamic
secret=EXT_PASSWORD
context=internal
deny=0.0.0.0/0.0.0.0
permit=192.168.0.0/255.255.0.0
Create a Dialplan

The dialplan is stored in extensions.conf.

[internal]
exten => s,1,Answer()
exten => s,2,Dial(SIP/EXT_NUMBER,10)
exten => s,3,Playback(vm-nobodyavail)
exten => s,4,VoiceMail(EXT_NUMBER@main)
exten => s,5,Hangup()
exten => EXT_NUMBER,1,Answer()
exten => EXT_NUMBER,2,Dial(SIP/EXT_NUMBER,10)
exten => EXT_NUMBER,3,Playback(vm-nobodyavail)
exten => EXT_NUMBER,4,VoiceMail(EXT_NUMBER@main)
exten => EXT_NUMBER,5,Hangup()

exten => _*97,1,VoiceMailMain(${CALLERID(num)}@main)
exten => _*97,2,Hangup()

include => voipms-inbound
include => voipms-outbound

[voipms-outbound]
exten => _1NXXNXXXXXX,1,Dial(SIP/${EXTEN}@voipms)
exten => _1NXXNXXXXXX,n,Hangup()
exten => _NXXNXXXXXX,1,Dial(SIP/1${EXTEN}@voipms)
exten => _NXXNXXXXXX,n,Hangup()
exten => _011.,1,Dial(SIP/${EXTEN}@voipms)
exten => _011.,n,Hangup()
exten => _00.,1,Dial(SIP/${EXTEN}@voipms)
exten => _00.,n,Hangup()

[voipms-inbound]
exten => DID_PHONE_NUMBER,1,Answer()
Configure voicemail.conf
[main]
EXT_NUMBER => VOICEMAIL_PIN, danny, EMAIL_ADDRESS
Reload Asterisk
$ sudo asterisk -rx reload

Monitor Your GNU/Linux Server

Motivation

One of the challenging of hosting services on your own GNU/Linux server is ensuring that the services remain running properly. There are free software monitoring packages that can be used to automatically detect various problems and notify you via email. There are some limitations to running the monitoring software on the same host that you want to monitor, because if the host becomes unreachable, you won’t be notified. However, it can still be useful for verifying that ports are open, processes are running, and performance is normal. If your server uses RAID, it is also critical to get notifications when a drive fails to avoid outages and most importantly prevent data loss. To accomplish these goals, my preference is to use icinga2.

Prerequisites

On Debian 9 GNU/Linux, install the icinga2 package.

sudo apt-get install -y icinga2
Setup IcingaWeb2

Install the icingaweb2 package.

sudo apt-get install -y icingaweb2

Enable the icingaweb2 apache configuration and reload apache.

sudo a2enconf icingaweb2
sudo systemctl reload apache2

Finally open a browser and navigate to /icingaweb2 and follow the installation wizard.

Modify http check to check for https

Add the following bolded line to /etc/icinga2/conf.d/hosts.conf:

object Host NodeName {
 ...
 vars.http_vhosts["http"] = {
 http_uri = "/"
 http_ssl = "true"
 }
}


Host Your Own WordPress Blog

Prerequisites

On a Debian 9 GNU/Linux, install the wordpress package and adjust file ownership and permissions for www-data user.

sudo apt-get install -y wordpress
sudo chown -R www-data:www-data /usr/share/wordpress/
sudo chmod -R g+w /usr/share/wordpress/
Configure Apache

Copy the following into /etc/apache2/conf-available/wordpress.conf.

Alias /blog /usr/share/wordpress
<Directory /usr/share/wordpress>
 Options FollowSymLinks
 AllowOverride Limit Options FileInfo
 DirectoryIndex index.php
 Require all granted
</Directory>

Enable the configuration and reload apache.

sudo a2enconf wordpress
sudo systemctl reload apache2


Create a Free Software Baby Monitor with Zoneminder

Motivation

When trying to figure out what baby monitor to buy, I found that there are three types of baby monitors: “cloud”-based monitors, IP cameras, and short-range RF monitors without network connectivity. The first two are capable of being accessed remotely, but the last one can only be accessed from within a few hundred feet. The “cloud”-based monitors are convenient but are a huge invasion of privacy because they give a third party access to your baby monitor. If you want to be able to view your baby monitor remotely without sacrificing your privacy, I have found the best choice is using an IP camera and using a free software package called zoneminder to access it.

Prerequisites

On Debian 9 GNU/Linux, install the zoneminder package.

sudo apt-get install -y zoneminder
Enable Web Interface

To enable the web interface, simply enable the zoneminder configuration in apache2 and tell it to reload.

sudo a2enconf zoneminder
sudo systemctl reload apache2
Hardening Zoneminder

Click the Options link in the upper right hand corner, navigate to the Users tab, and click the “Add New User” button. Give the user full permissions and delete the default user. Then navigate to the System tab and enable OPT_USE_AUTH to enable authentication.

Adding a Monitor

Note that the specific settings you want to choose may vary depending on the model of your IP camera. To add a monitor, click the “Add New Monitor” button, choose a unique name for the monitor, and select the Ffmpeg source type. Navigate to the source path and set the source path to “rtsp://user:password@hostname”. Navigate back to the general tab, enable the monitor, and click save.

Host Your Own Music Streaming Service with Subsonic

Motivation

Many people use music streaming services for the convenience and portability they can offer. However, nearly all of the ones I could find require the use of non-free software, use Digital Restrictions Management (DRM), and prevent you from sharing music with friends and family. All of these problems can be avoided by hosting your own music streaming service on your own server.

Prerequisites

On Debian 9 GNU/Linux, install subsonic from the repository.

sudo apt-get install -y subsonic
Configure Subsonic

The configuration file for subsonic is located at /etc/default/subsonic. Modify the SUBSONIC_USER setting to be subsonic. This improves security because if the daemon is compromised, the intruder doesn’t get root access. Modify the SUBSONIC_ARGS to specify the context of /subsonic, the port as 8080 and the max-memory as 150.

SUBSONIC_ARGS="--context-path=/subsonic --port=8080 --max-memory=150"
SUBSONIC_USER=subsonic
Issues with the Default Configuration

By default subsonic runs on a non-standard port and does not use TLS encryption. Since you are entering credentials to subsonic, it a good idea to use TLS encryption to prevent eavesdroppers from discovering your password. While you can configure subsonic to run TLS encryption with self-signed certificate, I found it difficult to get it to use a trusted certificate. Running on a non-standard port may also require you to add an additional port-forwarding rule on your router for you to access subsonic remotely. If you already have apache setup with port-forwarding and a trusted TLS certificate, then this these problems can be solved by simply having apache act as a proxy to the subsonic service.

Configure Apache as a Web Proxy

First ensure that apache is installed and the proxy and proxy_http modules are enabled.

sudo apt-get install -y apache2
sudo a2enmod proxy proxy_http

Then create the text file /etc/apache2/conf-available/subsonic.conf and copy the following content into the file:

SSLProxyEngine On
ProxyPreserveHost Off
ProxyRequests Off
<Location /subsonic>
 ProxyPass http://localhost:8080/subsonic
 ProxyPassReverse http://localhost:8080/subsonic
</Location>

Finally, enable the proxy and reload the apache2 service.

sudo a2enconf subsonic
sudo systemctl reload apache2

Host Your Own Samba File Server

Motivation

A common problem with running a mixed-environment is sharing files between GNU/Linux and Windows computers. The best way to provide Windows computers access to your GNU/Linux file server is using Samba.

Prerequisites

Install samba server and client packages.

$ sudo apt-get install -y samba smbclient
Configure Samba Server

I configure two shares: one read-only (called data) and one read-write (called data-rw). Append the following to the end of /etc/samba/smb.conf:

[data]
 comment = Data Share (read-only)
 path = /mnt/md0/
 available = yes
 valid users = myuser
 read only = yes
 browseable = yes
 public = yes
 writeable = no
[data-rw]
 comment = Data Share
 path = /mnt/md0/
 available = yes
 valid users = myuser
 read only = no
 browseable = yes
 public = yes
 writeable = yes
Create Samba User

Next, create a new samba user using the following command and it will prompt you to specify a password for the user and then again to confirm the password.

sudo smbpasswd -a myuser
New SMB password:
Retype new SMB password:
Verify the Configuration with testparm

The testparm utility checks the /etc/samba/smb.conf configuration file for internal correctness.

$ testparm
Load smb config files from /etc/samba/smb.conf
rlimit_max: increasing rlimit_max (1024) to minimum Windows limit (16384)
WARNING: The "syslog" option is deprecated
Processing section "[homes]"
Processing section "[printers]"
Processing section "[print$]"
Processing section "[data]"
Processing section "[data-rw]"
Loaded services file OK.
Server role: ROLE_STANDALONE

Press enter to see a dump of your service definitions
Test the Samba Server with smbclient and smbget

smbclient can be used to verify that all the shares are available on the server.

$ smbclient -L euclid
Domain=[WORKGROUP] OS=[Windows 6.1] Server=[Samba 4.5.8-Debian]

 Sharename   Type    Comment
 ---------   ----    -------
 print$      Disk    Printer Drivers
 data        Disk    Data Share (read-only)
 data-rw     Disk    Data Share
 IPC$        IPC     IPC Service (Samba 4.5.8-Debian)
 myuser      Disk    Home Directories
Domain=[WORKGROUP] OS=[Windows 6.1] Server=[Samba 4.5.8-Debian]

 Server         Comment
 ---------      -------
 EUCLID         Samba 4.5.8-Debian

 Workgroup      Master
 ---------      -------
 WORKGROUP      EUCLID

smbget is a wget-like utility for downloading files from a samba share

$ smbget smb://euclid/data/test.txt
Using workgroup WORKGROUP, user myuser
smb://euclid/data/test.txt
Downloaded 830b in 1 seconds

Customize Your Debian GNU/Linux Server

Background

There are many GNU/Linux distributions available but my favorite is Debian. The latest version at the time of this post is Debian 9 “Strecth”. Debian does not come optimally prepared for my specific needs right out of the box. Other distributions come with some of these things pre-installed, but Debian does not want to force them on those who don’t want them. However, with a few quick configuration changes and additional packages, the system can be greatly improved. This post describes the initial changes I prefer to make after installing the stock images.

Ensure the Packages are Updated

The first step is to ensure that all packages are up to date.

# apt-get update
# apt-get upgrade
Install etckeeper

The first thing I like to install is etckeeper, which keeps track of any changes made to etc configuration files with a version control system.  But before I install etckeeper, I first install and configure git. I prefer to do this first so that all my other configuration changes in /etc are tracked in git.

# apt-get install -y git
# git config --global user.name "Jon Doe"
# git config --global user.email "jondoe@example.com"
# apt-get install -y etckeeper
Install vim

Next I like to install vim and make sure it is selected as the default editor.

# apt-get install -y vim
# echo 'SELECTED_EDITOR="/usr/bin/vim.basic"' > ~/.selected_editor

I also run update-alternatives to set vim.basic as my editor of choice. You can optionally use readlink to confirm that the change worked.

# update-alternatives --set editor /usr/bin/vim.basic
# readlink /etc/alternatives/editor
/usr/bin/vim.basic
Modify bashrc

Define PS1 in root’s .bashrc to add color to terminal prompt.

# sed -i \
 -e "s/^# export LS_OPTIONS='--color=auto'$/export LS_OPTIONS='--color=auto'/" \
 -e "s/^# eval \"\`dircolors\`\"$/eval \"\`dircolors\`\"/" \
 -e "s/^# alias ls='ls \$LS_OPTIONS'$/alias ls='ls \$LS_OPTIONS'/" \
 -e "s/^# alias ll='ls \$LS_OPTIONS -l'$/alias ll='ls \$LS_OPTIONS -l'/" \
 -e "s/^# alias l='ls \$LS_OPTIONS -lA'$/alias l='ls \$LS_OPTIONS -lA'/" \
 -e "s/^# alias rm='rm -i'$/alias rm='rm -i'/" \
 -e "s/^# alias cp='cp -i'$/alias cp='cp -i'/" \
 -e "s/^# alias mv='mv -i'$/alias mv='mv -i'/" \
 /root/.bashrc
# echo "PS1='${debian_chroot:+($debian_chroot)}\[\033[01;31m\]\u@\h\[\033[00m\]:\[\033[01;34m\]\w\[\033[00m\]$ '" >> /root/.bashrc
Setup User Account

Next, I create a user account, add it to the sudo group, and update it’s .bashrc file.

# apt-get install -y sudo
# adduser danny
# adduser danny sudo
# sed -i \
 -e "s/^#force_color_prompt=yes$/force_color_prompt=yes/" \
 -e "s/^ #alias ls='ls --color=auto'$/ alias ls='ls --color=auto'/" \
 -e "s/^ #alias grep='grep --color=auto'$/ alias grep='grep --color=auto'/" \
 -e "s/^ #alias fgrep='fgrep --color=auto'$/ alias fgrep='fgrep --color=auto'/" \
 -e "s/^ #alias egrep='egrep --color=auto'$/ alias egrep='egrep --color=auto'/" \
 -e "s/^#alias ll='ls -l'/alias ll='ls -l'/" \
 -e "s/^#alias la='ls -A'/alias la='ls -A'/" \
 -e "s/^#alias l='ls -CF'/alias l='ls -CF'/" \
 -e "$a\\nexport PATH=$PATH:/usr/sbin:/sbin" \
 /home/danny/.bashrc
Keep Clock Synchronized with NTP

To keep the clock synchronized with internet standard time servers, install the ntp daemon.

$ sudo apt-get install -y ntp
Prevent Catastrophic User Error

Next, I like to install several packages that help prevent catastrophic user error. Firstly, I like to install safe-rm, which is a wrapper around the rm command that prevents accidental deletions of files. Secondly, I like to install molly-guard, which guards against accidental shutdowns or reboots by prompting the user for the hostname before allowing the instructions to execute.

$ sudo apt-get install -y safe-rm molly-guard
Ensure Latest Version of Libraries Are In Use

needrestart checks which running daemons need to be restarted after library upgrades. This may help catch issues sooner and ensure that the latest version of the library is being used by all running daemons. It also informs you when a restart is required to use a newer version of the kernel.

$ sudo apt-get install -y needrestart
Make iptables Changes Persistent

By default changes to iptables will not be preserved on reboot. To fix this, I install iptables-persistent and have it save the current running configuration to /etc/iptables/rules.v4 and /etc/iptables/rules.v6 for IPv4 and IPv6, respsectively.

$ sudo apt-get install -y iptables-persistent

Whenever changes are made to iptables, the files can be updated with the following commands for IPv4 and IPv6, respectively:

$ sudo iptables-save > /etc/iptables/rules.v4
$ sudo ip6tables-save > /etc/iptables/rules.v6
Email Notifications Listing Packages Pending an Upgrade

Some upgrades  have important bug or security patches that leave the system vulnerable if they remain unpatched. Email notifications may help keep the system administrator informed about important updates.

$ sudo apt-get install -y apticron
Install and Configure ufw

Uncomplicated firewall (ufw) is an easy to use front-end for netfilter.

$ sudo apt-get install ufw
$ sudo ufw allow ssh
$ sudo ufw enable
Install Optional Utilities

The tree utility lists contents of directories in a tree-like format. The file utility determines file type. The less utility is an alternative pager to the more utility that allows scrolling upwards.

$ sudo apt-get install -y tree file less

The dos2unix utility converts text files from DOS to Unix. The renameutils package provides utilities for quickly moving or copying files, editing the file name in a text editor. The bzip2 package provides utilities for bzip2 compression.

$ sudo apt-get install -y dos2unix renameutils bzip2

The sysstat package which provides iostat and mpstat. The dstat utility is an alternative to iostat and mpstat that is more pretty.

$ sudo apt-get install -y sysstat dstat

The htop utility is an alternative to top but allows you to scroll and looks pretty. The iotop utility is a top-like disk I/O monitor. The itop utility is a top-like interrupt load monitor.

$ sudo apt-get install -y htop iotop itop iftop

The dnsutils package provides dig and nslookup. The bind9-host provides the host utility.

$ sudo apt-get install -y dnsutils bind9-host

The mtr-tiny package provides the mtr utility which combines the ping and traceroute programs in a single diagnostic tool. Th telnet utility is useful for testing TCP connectivity. The nmap utility is a network exploration tool and port scanner. The tcpdump utility dumps traffic on a network.

$ sudo apt-get install -y mtr-tiny telnet nmap tcpdump

Create RAID6 Array with mdadm and xfs

I recently used mdadm to setup RAID6 on my GNU/Linux file servers. The following is a tutorial on the commands I ran on debian 9 stretch to accomplish this task.

Prerequisites

You will need to install the parted, mdadm, and xfsprogs packages. GNU parted is used to create partition tables. mdadm is used to create and maintain multi devices. The xfsprogs package contains several xfs related utilities including mkfs.xfs and xfs_info.

$ sudo apt-get install parted mdadm xfsprogs
Create Partition Table

The first step in preparing your disk drives is to create the GPT partition table.

$ sudo parted /dev/sdb mklabel gpt
Create Partition

Next you need to create the partitions. While this step is optional since the RAID array can be built from devices, it is recommended that you use partitions so that down the road you have the option of replacing a drive with one of equal or greater capacity. For my purposes, I just created a single partition that consumes all of the available space.

The “-a optimal” option tells parted to use optimal alignment.

$ sudo parted -a optimal /dev/sdb mkpart primary 0% 100%
Enable the RAID Flag

Next you need to set the raid flag on the partition.

$ sudo parted /dev/sdb set 1 raid on
Verify the Configuration

You can verify that the Partition Table is type gpt, the primary partiton has been created with the appropriate size and that the raid flag is set on that partition.

$ sudo parted /dev/sdb print
Model: ATA HGST HDN724040AL (scsi)
Disk /dev/sdb: 4001GB
Sector size (logical/physical): 512B/4096B
Partition Table: gpt
Disk Flags:

Number Start  End    Size   File system Name    Flags
1      1049kB 4001GB 4001GB             primary raid
Create the Multi Device

After you have completed the previous steps on all disks, the next step is to create the multi device (md). In my case, I am creating a RAID6 multi device from 7 partitions.

$ sudo mdadm --create --verbose /dev/md0 --level=6 --raid-devices=6 /dev/sd{b,c,d,e,f,g,h}1

The multi device is created, but it will not be preserved on reboot. To preserve the configuration on reboot we need to append to the mdadm configuration file. You may also need to update initramfs and grub to ensure the multi device is automatically assembled on reboot.

$ sudo mdadm --detail --scan | sudo tee -a /etc/mdadm/mdadm.conf
$ sudo update-initramfs -u
$ sudo update-grub
Create the XFS Filesystem

Now that we have a multi device, we can create the filesystem. I recommend using xfs if the effective capacity of your multi device may eventually grow to be more than 16TB of hard drive space.

The “-d” option allows us to specify one or more disk parameters.

The sunit disk parameter stands for Stripe Unit. It is optimal when assigned to the Stripe Size in bytes divided by 512. In my case the Stripe Size is 512KB, and thus the optimal Stripe Unit is 1024.

The swidth disk parameter stands for Stripe Width. It is defined by the number of non-parity disks times Stripe Unit. In my case, I am using RAID6 with a total of 7 disks. Since RAID6 requires 2 parity disks, that leaves me with 5 non-parity disks. Thus the optimal Stripe Width is 5120 (5 non-parity disks times the 1024 Stripe Unit).

$ sudo mkfs.xfs -d sunit=1024,swidth=5120 /dev/md0

You can verify the sunit and swidth settings aftewards, but it can be tricky because the units are different. With mkfs.xfs they are defined as a multiple of 512-bytes. With xfs_info, they are defined as a multiples of the block size (bsize). In this case bsize is 4096. So the values appear as 1/8th of the value we specified in the mkfs.xfs command.

$ sudo xfs_info /dev/md0
meta-data=/dev/md0 isize=256 agcount=32, agsize=152612736 blks
 = sectsz=4096 attr=2, projid32bit=1
 = crc=0 finobt=0 spinodes=0 rmapbt=0
 = reflink=0
data = bsize=4096 blocks=4883607040, imaxpct=5
 = sunit=128 swidth=640 blks
naming =version 2 bsize=4096 ascii-ci=0 ftype=0
log =internal bsize=4096 blocks=521728, version=2
 = sectsz=4096 sunit=1 blks, lazy-count
Alternative: Create the ext4 Filesystem

If you are certain you will never exceed the 16TB limit, then ext4 is a reasonable alternative choice for a filesystem. Note that you should only run this command if you are using ext4 instead of xfs.

$ sudo mkfs.ext4 -F /dev/md0
Mount the Multi Device

A mount point is simply the directory to which the device is mounted. So we just need to make sure that directory exists and mount the multi device to the newly created mount point.

$ sudo mkdir -p /mnt/md0
$ sudo mount /dev/md0 /mnt/md0

Next we update fstab to preserve the changes on reboot.

$ echo '/dev/md0 /mnt/md0 xfs defaults,nofail 0 0' | sudo tee -a /etc/fstab

Finally df can be used to verify the disk is mounted and displays the usage.

$ df -h -t xfs
Filesystem Size Used Avail Use% Mounted on
/dev/md0   19T  0T   0T    0%   /mnt/md0
Verify the Setup

You can verify the setup with lsblk. It shows the disk device and capacity, the raid partition, and multi device and its capacity, filesystem type, raid level, and mount point.

$ lsblk -o NAME,SIZE,FSTYPE,TYPE,MOUNTPOINT /dev/sd{b,c,d,e,f,g,h}
NAME SIZE FSTYPE TYPE MOUNTPOINT
sdb 3.7T disk
└─sdb1 3.7T linux_raid_member part
 └─md0 18.2T xfs raid6 /mnt/md0
sdc 3.7T disk
└─sdc1 3.7T linux_raid_member part
 └─md0 18.2T xfs raid6 /mnt/md0
sdd 3.7T disk
└─sdd1 3.7T linux_raid_member part
 └─md0 18.2T xfs raid6 /mnt/md0
sde 3.7T disk
└─sde1 3.7T linux_raid_member part
 └─md0 18.2T xfs raid6 /mnt/md0
sdf 3.7T disk
└─sdf1 3.7T linux_raid_member part
 └─md0 18.2T xfs raid6 /mnt/md0
sdg 3.7T disk
└─sdg1 3.7T linux_raid_member part
 └─md0 18.2T xfs raid6 /mnt/md0
sdh 3.7T disk
└─sdh1 3.7T linux_raid_member part
 └─md0 18.2T xfs raid6 /mnt/md0

You can view the state of multi devices using the proc virtual filesystem.

$ cat /proc/mdstat
Personalities : [raid6] [raid5] [raid4] [linear] [multipath] [raid0] [raid1] [raid10]
md0 : active raid6 sdc1[4] sdg1[3] sde1[2] sdd1[7] sdf1[6] sdh1[0] sdb1[5]
 19534428160 blocks super 1.2 level 6, 512k chunk, algorithm 2 [7/7] [UUUUUUU]
 bitmap: 0/30 pages [0KB], 65536KB chunk

unused devices: <none>

Lastly, you can view detailed information about a multi device using mdadm.

$ sudo mdadm --detail /dev/md0
/dev/md0:
 Version : 1.2
 Creation Time : Mon May 22 21:28:46 2017
 Raid Level : raid6
 Array Size : 19534428160 (18629.48 GiB 20003.25 GB)
 Used Dev Size : 3906885632 (3725.90 GiB 4000.65 GB)
 Raid Devices : 7
 Total Devices : 7
 Persistence : Superblock is persistent

Intent Bitmap : Internal

Update Time : Fri Sep 8 20:07:07 2017
 State : clean
 Active Devices : 7
Working Devices : 7
 Failed Devices : 0
 Spare Devices : 0

Layout : left-symmetric
 Chunk Size : 512K

Name : euclid:0 (local to host euclid)
 UUID : a7faccce:58914d5e:b26cce7e:795b773b
 Events : 48719

Number Major Minor RaidDevice State
 0 8 113 0 active sync /dev/sdh1
 6 8 81 1 active sync /dev/sdf1
 7 8 49 2 active sync /dev/sdd1
 3 8 97 3 active sync /dev/sdg1
 4 8 1 4 active sync /dev/sdc1
 5 8 17 5 active sync /dev/sdb1
 2 8 65 6 active sync /dev/sde1

Build Your Own Homelab

Motivation:

When I began my research to purchase hardware for a homelab, I wanted to purchase enough parts for two complete systems that could mirror each others data. The primary goal is to have enough storage capacity to hold all of my data and reduce the odds of losing data in the event of hardware failure or user error. Although RAID6 itself provides some redundancy, it does not provide a backup.  By having the data stored on two independent file servers, a complete backup of all files is maintained. For example if I accidentally delete a file from one server, my backup server will maintain a copy of that file until the next time the drives are synchronized. A secondary goal is to use the server to reliably host a number of useful services at my home within a DMZ that can be accessed remotely.

Requirements:

Since I am running the servers as headless GNU/Linux boxes, it is very useful to have IPMI for initial setup and maintenance. I also was interested in having hot-swap hard drive bays so I could replace failed hard drives without having to power down or open the case. Noise and heat were also a major concerns for me because my homelab is located in my living room and I didn’t want servers that sounded jet engines or produced too much heat. Lastly, I am interested in the case being rack-mountable for flexibility in the future.

Server Hardware:

The SSDs are SATA rather than M.2 and a couple generations older than the rest of the system, but I used them because I already had them lying around. Similarly I already had eight 4TB HGST DeskStar NAS drives and decided to buy more to expand my capacity. With 7x 4TB drives in a software RAID6 array, each server now has 20TB of effective capacity. I initially purchased the X11SSH-LN4F motherboard intending to use it to avoid double NAT and act as a VPN gateway, but after some experimentation, I found that having my GNU/Linux server act as the router for my home network was problematic. For the second motherboard I purchased the X11SSM-F which offers additional PCIe slots at a cheaper price, but the downside to it is it is missing the M.2 slot. I chose the RAM based on the Supermicro tested memory list to avoid any incompatibilities. After a lot of research I decided to go with the 743TQ case based on its balance of price, “whisper-quiet” noise level (<28dB), compatibility with Supermicro motherboards, ability to stand on its own or be rack-mounted, and for it’s ability to expand to support 13 hard drives (with the purchase of a mobile rack that replaces the 3x 5.25″ bays). I purchased the additional PWM case fans to keep all the hard drives cool. Lastly the Xeon E3-1200 series processor is probably overkill for my use case, but it may come in handy down the road if I decide to do anything CPU intensive such as hosting many virtual servers. Although there were slightly cheaper models, I opted to pay a little more to get hyper-threading support and the higher CPU frequency. However, I did not get the most expensive models because of the diminishing returns on performance for the price.

Network Hardware:

Instead of using my GNU/Linux server as a router, I decided to purchase a Ubiquiti EdgeRouter Lite and have been very happy with the price and performance of this product. To avoid monthly rental costs, I also replaced my Xfinity router with a cable modem that I own and control. I also reused my Cisco IP Phone that I’ve used for years for my custom home telephony service.