Background
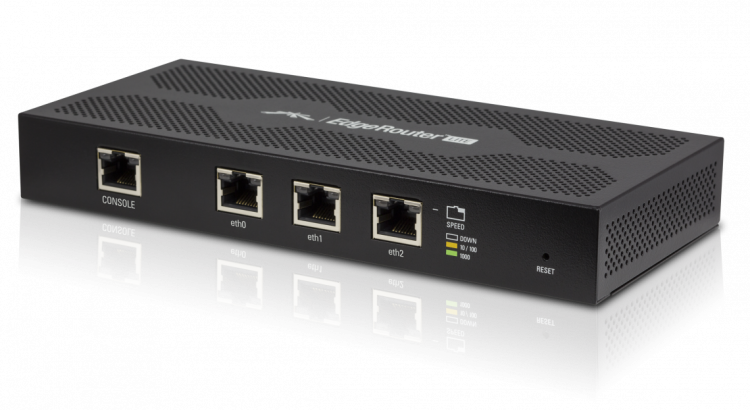
The Ubiquiti EdgeRouter Lite (ERL) is a bit different than your typical SOHO “router”, which is a combination of a router, a switch, and an access point. I have had some pretty bad experiences with these all-in-one products. The firmware provided with all-in-one routers tends to be very buggy. The idea behind the ERL is that it focuses specifically on the router portion of the gateway. If you have more than one wired client, you will also need a switch. If you don’t have the need for VLANs, you can pick up an inexpensive unmanaged switch. You may also need to purchase a wireless access point if you want wifi. However, if you are replacing an all-in-one router, you can reconfigure it to run in access point mode.
Port Usage
The ERL has 3 ports which can be used in many different configurations. One possibility is to support balancing between two WAN connections. In my use case, I used the additional port for a DMZ. The DMZ could alternatively be implemented logically with a single port using VLANs, but this requires a switch with VLAN support. It is possible to configure it such that two ports belong to the same network, but I don’t recommend this configuration because it will hurt network performance. If not implementing a DMZ or using multiple WANs, I recommend using one port for a wired LAN and one port for a wireless LAN.
Initial Configuration
Modify the gui to use non-standard ports. This allows us to port forward the default 80 and 443 ports to a webserver hosted in the DMZ.
set service gui http-port 7080
set service gui https-port 7443
Adjust the hostname and time zone to meet your needs.
set system host-name myrouter
set system time-zone America/Chicago
One issue is that by default the DNS server will resolve the router’s hostname as 127.0.1.1. This may be undesirable if trying to ssh into the router from within the LAN or DMZ. To resolve this issue, you can override the IP returned when resolving the hostname of the router itself.
set system ip override-hostname-ip 192.168.102.1
Initial Firewall Setup
Next, perform the initial firewall setup.
edit firewall
set all-ping enable
set broadcast-ping disable
set ipv6-receive-redirects disable
set ipv6-src-route disable
set ip-src-route disable
set log-martians enable
set receive-redirects disable
set send-redirects enable
set source-validation disable
set syn-cookies enable
top
Allow-all Firewall
Create allow-all firewall, which allows through all connections.
edit firewall name allow-all
set default-action accept
set rule 1 action drop
set rule 1 description 'Drop invalid state'
set rule 1 log enable
set rule 1 state invalid enable
top
Allow-Established Firewall
Create the allow-est-drop-inv firewall, which allows through only established connections.
edit firewall name allow-est-drop-inv
set default-action drop
set enable-default-log
set rule 1 action accept
set rule 1 description 'Allow established connections'
set rule 1 state established enable
set rule 1 state related enable
set rule 2 action drop
set rule 2 description 'Drop invalid state'
set rule 2 log enable
set rule 2 state invalid enable
top
Configure LAN Interface
eth2 is configured as my LAN interface with the static IP 192.168.101.1 and acts as the gateway for the 192.168.101.0/24 subnet
edit interfaces ethernet eth2
set address 192.168.101.1/24
set description LAN
set duplex auto
set speed auto
top
Configure LAN DHCP
Next we setup the authoritative DHCP server for the LAN. We want it to make the LAN port on the ERL the default route and DNS server for the LAN subnet. You specify the range of dynamic IP pools. The range of valid hosts is .1 to .254 but we are already using .1 for the router. Since my home network is small, I reserved the .2 through .99 IPs for use as static mappings. The lease 86400 setting indicates a 24 hour DHCP lease duration.
edit service dhcp-server shared-network-name LAN
set authoritative enable
set subnet 192.168.1.0/24 default-router 192.168.101.1
set subnet 192.168.1.0/24 dns-server 192.168.101.1
set subnet 192.168.1.0/24 lease 86400
set subnet 192.168.1.0/24 start 192.168.101.100 stop 192.168.101.254
top
Next we configure a static mapping for each host in the DMZ using their MAC address.
edit service dhcp-server shared-network-name LAN subnet 192.168.1.0/24
set static-mapping myhost1 ip-address 192.168.101.2
set static-mapping myhost1 mac-address 'ab:cd:ef:34:56:78'
set static-mapping myhost2 ip-address 192.168.101.3
set static-mapping myhost2 mac-address 'ab:cd:ef:56:78:90'
top
Configure LAN DNS
Next we specify the desired alias and IP address for each host in the LAN.
edit system static-host-mapping
set host-name myhost1.lan alias myhost1
set host-name myhost1.lan inet 192.168.101.2
set host-name myhost2.lan alias myhost2
set host-name myhost2.lan inet 192.168.101.3
top
Configure LAN firewall
First we create the zone policy for LAN to drop all traffic by default.
edit zone-policy zone LAN
set interface eth2
set default-action drop
top
Then we create the zone policy for local such that all traffic from local is allowed, but limited traffic to local is allowed.
edit zone-policy zone local
set local-zone
set default-action drop
set from LAN firewall name lan-local
set from local firewall name allow-all
top
lan-local firewall
Create the lan-local firewall such that only established connections, ICMP/DNS/DHCP traffic, and SSH/HTTPS for router maintenance are allowed.
edit firewall name lan-local
set default-action drop
set enable-default-log
set rule 1 action accept
set rule 1 description 'Allow established connections'
set rule 1 state established enable
set rule 1 state related enable
set rule 2 action drop
set rule 2 description 'Drop invalid state'
set rule 2 log enable
set rule 2 state invalid enable
set rule 3 action accept
set rule 3 description 'Allow ICMP'
set rule 3 protocol icmp
set rule 4 action accept
set rule 4 description 'Allow SSH/HTTPS'
set rule 4 destination port 22,7443
set rule 4 protocol tcp
set rule 5 action accept
set rule 5 description 'Allow DNS'
set rule 5 destination port 53
set rule 5 protocol tcp_udp
set rule 6 action accept
set rule 6 description 'Allow DHCP'
set rule 6 destination port 67,68
set rule 6 protocol udp
top
Configure WAN Interface
eth0 is configured as my WAN interface and uses DHCP to acquire a dynamic ISP from my ISP via the cable modem
edit interfaces ethernet eth0
set address dhcp
set description WAN
set duplex auto
set speed auto
top
To make this work properly, we need to use NAT to share the single WAN IP address with all hosts in our DMZ and LAN.
edit service nat rule 5010
set description 'Masquerade for WAN'
set outbound-interface eth0
set type masquerade
top
Next, I configure the ERL as a forwarding DNS server. I prefer to use the google public DNS servers. Alternatively, you can use your ISP’s DNS servers, but at least my ISP, I have found them to be less reliable.
edit service dns forwarding
set cache-size 150
set listen-on eth2
set listen-on eth1
set name-server 8.8.8.8
set name-server 8.8.4.4
top
Configure LAN Firewall
Setup the zone policy for the DMZ, allowing all traffic from local and LAN, but only limited traffic back from WAN and DMZ.
edit zone-policy zone WAN
set interface eth0
set default-action drop
set from local firewall name allow-all
set from LAN firewall name allow-all
top
Set firewall for WAN to LAN to only allow established connections.
edit zone-policy zone LAN
set from WAN firewall name allow-est-drop-inv
top
Set firewall for WAN to local to wan-lan, which only allows established connections and SSH/HTTPS for remote router maintenance.
edit zone-policy zone local
set from WAN firewall name wan-local
top
wan-local firewall
Create the wan-local firewall, such that only established connections and SSH/HTTPS (for remote router maintenance) are allowed.
edit firewall name wan-local
set default-action drop
set enable-default-log
set rule 1 action accept
set rule 1 description 'Allow established connections'
set rule 1 state established enable
set rule 1 state related enable
set rule 2 action drop
set rule 2 description 'Drop invalid state'
set rule 2 log enable
set rule 2 state invalid enable
set rule 3 action accept
set rule 3 description 'Allow SSH/HTTPS'
set rule 3 destination port 22,7443
set rule 3 protocol tcp
top
Configure DMZ Interface
The configuration for the DMZ is almost identical to that for the LAN.
eth1 is configured as my DMZ interface with the static IP 192.168.102.1 and acts as the gateway for the 192.168.102.0/24 subnet
edit interfaces ethernet eth1
set address 192.168.102.1/24
set description DMZ
set duplex auto
set speed auto
top
Configure DMZ DHCP
Next we setup the authoritative DHCP server for the DMZ. We want it to make the DMZ port on the ERL the default route and DNS server for the DMZ subnet. You specify the range of dynamic IP pools. The range of valid hosts is .1 to .254 but we are already using .1 for the router. Since my home network is small, I reserved the .2 through .99 IPs for use as static mappings. The lease 86400 setting indicates a 24 hour DHCP lease duration.
edit service dhcp-server shared-network-name DMZ
set authoritative enable
set subnet 192.168.102.0/24 default-router 192.168.102.1
set subnet 192.168.102.0/24 dns-server 192.168.102.1
set subnet 192.168.102.0/24 lease 86400
set subnet 192.168.102.0/24 start 192.168.2.100 stop 192.168.102.254
top
Next we configure a static mapping for each host in the DMZ using their MAC address.
edit service dhcp-server shared-network-name DMZ subnet 192.168.102.0/24
set static-mapping myhost3 ip-address 192.168.102.2
set static-mapping myhost3 mac-address 'ab:cd:ef:12:34:56'
set static-mapping myhost4 ip-address 192.168.102.3
set static-mapping myhost4 mac-address 'ab:cd:ef:23:45:67'
top
Configure DMZ DNS
Next we specify the desired alias and IP address for each host in the LAN and DMZ.
edit system static-host-mapping
set host-name myhost3.dmz alias myhost3
set host-name myhost3.dmz inet 192.168.102.2
set host-name myhost4.dmz alias myhost4
set host-name myhost4.dmz inet 192.168.102.3
top
Port Forwarding
Depending on what services you are hosting within your DMZ, you will need to setup port forwarding to allow external clients to reach your server(s).
For example, if your server with IP 192.168.102.2 is listening for connections on the standard SSH port of 22, you can forward connections to port 2222 to the server.
edit service nat rule 3
set description 'Port forward 2222 to 22'
set destination port 2222
set inbound-interface eth+
set inside-address address 192.168.102.2
set inside-address port 22
set log disable
set protocol tcp
set type destination
top
Configure DMZ firewall
Setup the zone policy for the DMZ, allowing all traffic from local, but allowing only limited traffic from the LAN and WAN.
edit zone-policy zone DMZ
set interface eth1
set default-action drop
set from LAN firewall name lan-dmz
set from WAN firewall name wan-dmz
set from local firewall name allow-all
top
Set firewall for DMZ to WAN to only allow all.
edit zone-policy zone WAN
set from DMZ firewall name allow-all
top
Set firewall for DMZ to LAN to only allow established connections.
edit zone-policy zone LAN
set from DMZ firewall name allow-est-drop-inv
top
Set firewall for DMZ to local to dmz-local to only allow established connections.
edit zone-policy zone local
set from DMZ firewall name dmz-local
top
dmz-local firewall
Create dmz-local firewall such that only ICMP/DNS/DHCP traffic, established connections, and SSH/HTTPS (for router maintenance) are allowed.
edit firewall name dmz-local
set default-action drop
set enable-default-log
set rule 1 action accept
set rule 1 description 'Allow established connections'
set rule 1 state established enable
set rule 1 state related enable
set rule 2 action drop
set rule 2 description 'Drop invalid state'
set rule 2 log enable
set rule 2 state invalid enable
set rule 3 action accept
set rule 3 description 'Allow ICMP'
set rule 3 protocol icmp
set rule 4 action accept
set rule 4 description 'Allow SSH/HTTP/HTTPS'
set rule 4 destination port 22,7443
set rule 4 protocol tcp
set rule 5 action accept
set rule 5 description 'Allow DNS'
set rule 5 destination port 53
set rule 5 protocol tcp_udp
set rule 6 action accept
set rule 6 description 'Allow DHCP'
set rule 6 destination port 67,68
set rule 6 protocol udp
top
lan-dmz Firewall
Create lan-dmz firewall such that only ICMP traffic, NetBIOS/SSH/SMB/HTTPS to a specific host, and established connections are allowed.
edit firewall name lan-dmz
set default-action drop
set enable-default-log
set rule 1 action accept
set rule 1 description 'Allow established connections'
set rule 1 state established enable
set rule 1 state related enable
set rule 2 action drop
set rule 2 description 'Drop invalid state'
set rule 2 log enable
set rule 2 state invalid enable
set rule 3 action accept
set rule 3 description 'Allow ICMP'
set rule 3 protocol icmp
set rule 4 action accept
set rule 4 description 'Allow SSH/SMB/HTTPS'
set rule 4 destination address 192.168.102.2
set rule 4 destination port 22,445,443
set rule 4 protocol tcp
set rule 5 action accept
set rule 5 description 'Allow NetBIOS'
set rule 5 destination address 192.168.102.2
set rule 5 destination port 137,138,139
set rule 5 protocol tcp_udp
top
wan-dmz Firewall
Create wan-dmz firewall such that only established connections and SSH/HTTPS traffic to a specific host are allowed.
edit firewall name wan-dmz
set default-action drop
set enable-default-log
set rule 1 action accept
set rule 1 description 'Allow established connections'
set rule 1 state established enable
set rule 1 state related enable
set rule 2 action drop
set rule 2 description 'Drop invalid state'
set rule 2 log enable
set rule 2 state invalid enable
set rule 3 action accept
set rule 3 description 'Allow SSH/HTTPS'
set rule 3 destination address 192.168.102.2
set rule 3 destination port 22,443
set rule 3 log disable
set rule 3 protocol tcp
top
Configure Hairpinning
A common issue you may encounter is if a host within your LAN uses the public IP address of your router to reach a service hosted within your DMZ, then you need to setup what is known as hairpinning (or loopback NAT). The following commands may be used for accessing a webserver via HTTPS within your DMZ from your LAN using your public IP address. Note that the destination address and port reflect the values after port forwarding rules have been applied.
edit service nat rule 5011
set description 'MASQ for hairpin'
set destination address 192.168.102.0/24
set destination port 443
set log disable
set outbound-interface eth1
set protocol tcp
set source address 192.168.102.0/24
set type masquerade
top
Setup Dynamic DNS
If you are hosting any services from your home network, it is important to know your public IP address. However, one common problem is that many residential ISPs don’t offer static public IP addresses (or only offer them with an expensive monthly charge). Thus, the ISP instead assigns you a dynamic public IP address that may change over time. One way to overcome this is to use a dynamic DNS service which periodically updates a DNS record with your new IP address.
If you do not have a static public IP address, I highly recommend using dynamic DNS to ensure you always know the public IP address of your router. The easiest and cheapest way to accomplish this is to sign up for an account on duckdns.org for free. The ERL can then automatically keep your IP address up-to-date using the dyndns2 protocol. Once signed up, you just need to replace the values for host-name and password listed in bold below.
edit service dns dynamic interface eth0 service custom-duckdns
set host-name myhostname
set login nouser
set password 12345678-1234-1234-1234-123456789012
set protocol dyndns2
set server www.duckdns.org
top